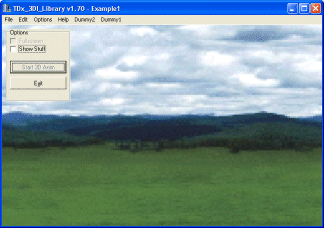


|
TDX DEMO APPLICATIONS
|

|
Below you will find a lot of TDx_Library demonstration applications...
These applications are suitable for execution on any Windows 95,98,ME,CE,NT,2000,XP,VISTA,7,8,10+ operating system
with DirectX 7 or better hardware and/or software installed...
Note: You can download more advanced DirectX 7 and DirectX 9 demos from here...
Top
TDx_Library:: Download v1.80, v1.90, v2.00 Free!

16+ Years of solid, continuous, dedicated programming, has finally resulted in this :-
- Download the entire TDx_Library v1.80, v1.90, v2.00 - NOW! (12+ Megabytes Download - Zipped)
- TDx_Draw: Advanced 2D Graphics - Blindingly-Fast (Multi-Monitor) Bit-Blitting, Palettes, Gamma Ramps, Video Ports, etc.
- TDx_Sound: Advanced Sound + Music - 2D + 3D Sound and Music and Recording, etc.
- TDx_Input: Advanced Input Devices - Force Feedback Devices - Direct Keyboard, 5-Button Mouse, Joysticks, Yokes, Steering Wheels, etc.
- TDx_Play: Advanced Networking - Massive Realtime Multiplayer Gaming, etc. Transparent Easy Networking, Internet, Modem, LAN, Cable, etc.
- TDx_3DI: Advanced 3D Graphics - Realtime 3D Graphics Rendering, etc... Plug-In your own 3d world engine and render it on nearly all hardwares on all autopilots...
107 Cutting-Edge Visual Object-Oriented Rapid-Application-Development DirectX Components for C++ Builder...
You need to Register at least (1) copy per developer if you are developing Commercial Software (if you earn money from it, then your software is 'Commercial Software')...
Top
Next
TDx_Library:: Download the Demos...!!!
- Download all or some of the TDx_Library v1.70 DEMOS for FREE - these Demos work with v1.80 and v1.90 perfectly without modification.
- Download all or some of the TDx_Library v1.90 DEMOS from the downloads page
Screenshots :-
-= TDx_Library =-
-= TDx_Draw_Library =-


-= TDx_Sound_Library =-


-= TDx_Input_Library =-


-= TDx_Play_Library =-


-= TDx_3DI_Library =-

Top
Pretty Cool...?
Imagine what it would be like to learn step-by-step how to program using the TDx_Library...
The demos are much more than this, with many more to come in future...
What do you think?
Is it worth Downloading the TDx_Library to see what you can create? in minutes...?
...
For other DirectX demos, click the link below :-

Other DirectX demos...
INTRODUCTION
Top
Next
- At the top of each example (with full C++ Builder & TDx source code) you will find a short description :-
- it explains the reasoning behind writing the example
- it also explains what the example does
- Click on a thumbnail image to view larger screen snapshots.
- right-click, open-in-new-window...
- the Design Time image shows the BCB development environment with components on a standard TForm.
- the Runtime image shows the application executing on a test pc, with results depending on the demo.
- Click on the "DOWNLOAD DEMO" option to download the demo application.
- Extract the demo executable and any accompanying files to a temporary directory.
- Execute the demo on any Windows 95, 98, ME, CE, NT, 2000, XP, Vista, 7, 8, 10+ pc with the DirectX 7 or later runtime installed.
- The demos should work fine, if not, maybe it's your pc configuration, not the demo, or maybe it's the demo? tell me here.
- Click on the "DOWNLOAD SOURCE CODE" option to view 100% of the source code including project files.
- After downloading the Source Code, extract all files and "restore paths".
- It's best to extract to the same drive as the TDx_Library, eg: [ C: ]
- This will place the source in (say) C:\TDx_Library\TDx_Draw_Library\Examples\*.*
INFORMATION ABOUT THE DEMOS
Top
Next
Prev
It helps if you study the Examples (Demos) with full source code and executables...
TDx_Library v1.70 Examples :-
Click here to download all currently available TDx_Library v1.70 demos and source code (1,516 Kb).
Click here to download all currently available TDx_Draw_Library v1.70 demos and source code (3,936 Kb).
Click here to download all currently available TDx_Sound_Library v1.70 demos and source code (2,081 Kb).
Click here to download all currently available TDx_Input_Library v1.70 demos and source code (1,447 Kb).
Click here to download all currently available TDx_Play_Library v1.70 demos and source code (854 Kb).
Click here to download all currently available TDx_3DI_Library v1.70 demos and source code (661 Kb).
TDx_Library v1.90 Examples :-
Click here to download all currently available TDx_Library v1.90 demos and source code (2,866 Kb).
Click here to download all currently available TDx_Draw_Library v1.90 demos and source code (3,998 Kb).
Click here to download all currently available TDx_Sound_Library v1.90 demos and source code (2,100 Kb).
Click here to download all currently available TDx_Input_Library v1.90 demos and source code (1,182 Kb).
Click here to download all currently available TDx_Play_Library v1.90 demos and source code (889 Kb).
Click here to download all currently available TDx_3DI_Library v1.90 demos and source code (697 Kb).
...
These relatively "simple" applications are shown below and are available complete with full source code,
meaning you can see exactly what is going on "behind the scenes" to make the demo a complete application.
For those who don't already know, you type "source code" in a "programming language", like "BASIC" or "C++",
then you use an application called a "compiler" to convert your source code into a working "application" which runs
on "Windows" operating systems.
There are really two main compilers for the "C++" programming language for Windows, either Microsoft Visual C++ or
Borland C++ Builder, of which Borland C++ Builder is in our opinion, much better, easier to use, and more powerful.
...
The source code is the magic that shows how to program a Windows application, and you will notice
that the TDx_Library source code is the very minimum amount of coding required to get things working.
Unlike when programming using Microsoft Visual C++ and DirectX, using our toolsets, the TDx_Library mixing
with Borland C++ Builder and DirectX, you don't need to do much at all to get your application working.
Instead of having to write hundreds of lines of Visual C++ code, plus additional wrapper functions, etc.
you can now write a fully-functioning DirectX application in as little as (4) lines of code... see below...
...
By stating that these applications are "relatively simple", i mean from the programmers perspective,
or "simple to code", not "simple" as in "lack of powerful features"...
Some of these demos are pretty basic, especially at the start of the page,
doing not much more than creating a DirectX interface, retrieving some information,
displaying that information, and destroying the DirectX interface when we've finished with it.
On the other hand, some of the later demos are incredibly powerful.
For example, displaying and stretching thousands of images in realtime,
or playing and mixing thousands of sound effects in realtime,
etc...
Considering how small the source code is for each demo application, and considering that each demo
only shows a single aspect of the entire TDx_Library, it only goes to show just how powerful the
entire TDx_Library is when used all together.
Remember, whatever is available in DirectX is available in the TDx_Library, just optimized to work
perfectly extending the Borland C++ Builder Visual Component Library (VCL)... so it's all as easy-to-use as BCB!
...
Below you will find many varied DirectX demos, each with full Borland C++ Builder v1,3,4,5,6 source code
and project files, covering as much detail about the TDx_Library as possible.
Each of these demos covers one major aspect of programming DirectX using the TDx_Library and C++ Builder,
and many more demos are envisaged to highlight more aspects of the TDx_Library, something we plan on doing
over the coming months and years, given enough time and money...
See below for more information on each individual demo application currently available.
...
These demos are designed to be like source code tutorials, teaching you step-by-step
how to program fully functioning DirectX applications using the TDx_Library and Borland C++ Builder.
Some knowledge of C++ Builder is preferred, though it's pretty straightforward for
any C++ programmer, even absolute beginners...
Of course, if you already know Borland C++ Builder inside-out, then the source code
will simply teach you all about using the TDx_Library components to program DirectX applications.
Any knowledge of DirectX is a bonus, but is not required, as these demos teach you step-by-step
all about DirectX programming using the TDx_Library, much easier than anything you've ever seen before
relating to DirectX, which normally is a "painful" experience.
Welcome to the magic of programming DirectX using the TDx_Library and Borland C++ Builder...
... simple as simple can be ...
From just (3) lines of code for the simplest application to say (12) lines of code for a fully-fledged
very powerful application complete with comprehensive error checking...
...
Except for the introduction example source code, these demos for the v1.70 libraries
come with BCB 1,3,4,5,6 project files and a TMainForm.CPP, TMainForm.H and TMainForm.DFM.
The majority of these demos were originally created for v1.42 of the TDx_Library, and have been
updated minimally ever since to keep up with successive versions of the TDx_Library...
To quickly view the source code, open the .zip, view the TMainForm.CPP and TMainForm.H files in
a plain text viewer, such as WordPad or NotePad or C++ Builder, take a look at the accompanying TForm's
picture and the ExampleX.exe, and notice how simple programming the TDx_Library is.
For serious enthusiasts, or those who already have the TDx_Library installed,
extract all files from the .zip file, restoring paths, and open the relevant project
in the BCB version of your choosing. Note that this will usually require the TDx_Library
components to be installed, but if you just ignore all warnings, you can still look
at the source code inside C++ Builder.
...
Many of the v1.70 demos will compile with earlier versions of the TDx_Library, such as v1.42, some will not.
Most of the v1.70 demos will compile happily with v1.62 of the TDx_Library.
Demos for other versions of the TDx_Library can be found on the Downloads page.
The demos below are pretty comprehensive, and should give you a fairly complete
overview of the TDx_Library v1.70.
...
You should start at the very first demo and work your way to the very last demo,
studying the changes in the source code from demo to demo.
Of course, you can execute all the demos in any order you choose, but it helps
to study them step-by-step from the top to the bottom too, as each demo builds on previous
knowledge detailed in previous demos to become progressively more advanced as you scroll down the page.
Note: Many of the TDx_Draw_Library demos paint using page-flipping, overwriting the VCL controls with displayed
data instead of clipping to the VCL borders... this is something i plan on fixing with v1.80 so as to show you
just how easy it is to mix and match the VCL and DirectX animation... one additional line of code per demo...
something shown in the latest TDx_3DI_Library demos... which correctly mixes VCL controls and DirectX 3D animation.
...
Note that the demos near the top detail the features first used when programming DirectX
applications, and explain general TDx_Library programming techniques.
Later demos document the more advanced features of programming DirectX and the TDx_Library,
and assume you have common knowledge gained from reading the earliest example source code.
...
These demos are actually quite old and were originally designed for the v1.42 libraries,
not the v1.70 libraries as such, and most of them are designed to simply carry out the necessary steps
required for the demo to function on the simplest level, with each demo aiming to
highlight a particular feature of the TDx_Library or DirectX.
Do not expect these demos to have full error checking, error handling, etc.
Instead they have been designed to keep complications to a bare minimum, and have
only the most rudimentary error checking and error handling, etc.
If a demo does not work as expected, please let us know.
...
Future v1.80 demos will be a little more robust, and i might even add some examples
of how to correctly handle various DirectX error codes.
But for now, making the demos simple to understand is the goal.
And thats something the following demos achieve.
I'm just trying to show you step by step that programming advanced DirectX applications
is now as quick and simple as using Borland C++ Builder's RAD VCL environment - even easier than
programming using the VCL in fact...
And all incredibly easy compared to "normal" Win32-based DirectX programming using Visual C++...
Nothing complicated here.
...
It helps to study each demo's executing image first, then execute the demo,
then study the demo's development image, then study the source code.
You will then notice how quick and simple programming using the TDx_Library really is.
A lot of the hard programming is done for you by the Borland C++ Builder programming environment,
and most of the TDx_Library code is simple line-by-line programming, making DirectX
perform all kinds of magic with each individual line of C++ Builder source code.
Overall, pretty simple.
1 short line of code, 1 "noticable" action.
...
Note that the demos are simple .exe applications, with accompanying .wav and .bmp files,
all other TDx_Library files are linked directly into the applications .exe...
...no .dll's or any other files required to be shipped with the application, keeping
the demos to a minimum file size, and keeping deployment complications to a minimum.
...
Note that once the new v1.80 libraries are completed, and released, i will be creating many more new demos,
including enhancing all existing demos where possible and a whole bunch of new demos i've already designed
and now just need to code, or make "real" in other words.
...
Please continue viewing the Instructions and Demos below.
...
Meantime, can you write Demos / small C++ Builder applications using the TDx_Library ???
We are seeking someone with C++ Builder or TDx_Library or DirectX programming
knowledge to help us write demos that are somewhat more advanced than those
shown below...
For example, we would like to get some source code together that shows a
simple multiplayer game that uses the TDx_Draw_Library for graphics, the
TDx_Sound_Library for sound fx and music and voice, that uses the TDx_Input_Library
for joystick and keyboard and mouse support, that uses the TDx_Play_Library
for multiplayer networking support, and possibly, using the TDx_3DI_Library for
some fancy 3d graphics displays...
We would love to do it, but money and time is our biggest killer.
If you can help us, by writing some Demos for display here, we would be eternally grateful.
Maybe you could do this? Develop some commercial-quality demos like "Endless Online"?
Or, alternatively, maybe you could spend an hour or two enhancing some of the demos below.
Or maybe you could spend an hour or two developing an all-new demo.
Maybe you have some test applications floating around that could be used as a demo?
Whatever you can come up with, it all helps.
...
Either way, we need your TDx_Library programming help...
Please, if you can help us code demos, send us an email at darren_john_dwyer@hotmail.com
TDX_LIBRARY
Top
Next
Prev
Next Library


This section contains demos that show the features common to all the TDx_Library.
This section also contains advanced demos that highlight the more advanced capabilities of the TDx_Library.
Below are demo / tutorial applications compiled using the TDx_Library v1.70 :-
Examples for the older libraries can be found on the Downloads page.
TDX_LIBRARY BASICS - PART 1 -
"THE SIMPLEST TDX_LIBRARY APPLICATION"
Top
Next
Prev

IDEA:
Automatic Creation and Destruction of everything... automatic garbage cleanup, etc...
Sounds like a good idea doesn't it?
Because the TDx_Library components have been derived from the standard C++ Builder VCL TComponent class,
most of the things necessary to make a DirectX application work are automatic, for example, the creation
and destruction of each component is handled automatically by the C++ Builder Visual Component Library (VCL),
hence you do not need to manually instantiate each object you are using - thats all automatic.
Similarly, the VCL handles the destruction of each component automatically.
The other thing that happens is that each TDx_Library component automatically allocates and deallocates the
raw DirectX resources it needs in order to function, so you can again ignore the cleanup of your memory, handles, etc.
as it is all done for you automatically.
EXAMPLE:
This example does pretty well the simplest thing you can do with the TDx_Library...
Just (3) Lines of code, to create an interface to the default DirectSound device, ie. the default sound card,
load a .wav file from disk into a memory DirectSoundBuffer, then play it out the default sound device once only.
CODE EXAMPLE:
// Open C++ Builder X with the TDx_Library installed, File->"New Application",
// Select the "TDx_Sound" tab from the standard C++ Builder component palette,
// Click & Drop a TDx_Sound component, a TDx_SoundBuffer component and a TDSBufferDesc component
// onto the standard newly-generated TForm...
// then drop a standard TButton onto the form, double-click on the new TButton, and add the code
// between the brackets below... which does the following :-
void __fastcall TForm1::Button1Click(TObject *Sender)
{
// create a DirectSound interface for the default Windows sound playback device
if (Dx_Sound1->Create(NULL))
// create a sound buffer from a .wav file, and save the buffer description into DSBufferDesc1
if (Dx_SoundBuffer1->CreateFromFile( "TEST.WAV", DSBufferDesc1, Dx_Sound1 ))
// play the sound immediately, starting at byte-offset 0, with no "looping"... once only
Dx_SoundBuffer1->Play(0,0);
// All done.
// Note: Destruction of objects and cleanup of resources is automatic and is taken care
// of by the TDx_Library maintaining everything to do with DirectX internally and
// working with the BCB VCL as necessary.
// At program exit, everything is returned to windows perfectly neat and tidy - automagically
}
SUMMARY:
Well, that was easy wasn't it? A fully-fledged DirectSound application designed to play a .wav file...
A few clicks, then just (3) lines of code...
|
TDX_LIBRARY BASICS - PART 2 -
"THIS IS WHAT 7 LINES OF CODE CAN DO"
Top
Next
Prev

IDEA:
You might have noted in the previous example that you have to do things like create a DirectSound interface
just to play a sound once... why? when you can just use the Windows API function PlaySound() to do the same thing,
with only one line of code required.
Ah. The Magic of DirectX. Again.
Suppose you want to play more that one sound at once... using real-time mixing of the sounds...
impossible using PlaySound()... but easy-as-bcb using the TDx_Library.
EXAMPLE:
This example does pretty well the next simplest thing you can do with the TDx_Library...
Mixing sounds on-the-fly...
Just (7) Lines of code, to create an interface to the default DirectSound device, load (3) .wav files from disk
into memory DirectSoundBuffers, then play all three sounds out the speakers simultaneously.
CODE EXAMPLE:
// Open C++ Builder X with the TDx_Library installed, File->"New Application",
// Select the "TDx_Sound" tab from the standard C++ Builder component palette,
// Click & Drop a TDx_Sound component, 3 TDx_SoundBuffer component's and a TDSBufferDesc component
// onto the standard newly-generated TForm...
// then drop a standard TButton onto the form, double-click on the new TButton, and add the code
// between the brackets below... which does the following :-
void __fastcall TForm1::Button1Click(TObject *Sender)
{
// create a DirectSound interface for the default Windows sound playback device
if (Dx_Sound1->Create(NULL))
{
// create (3) sound buffers from .wav files, and use the same temporary buffer description DSBufferDesc1
Dx_SoundBuffer1->CreateFromFile( "TEST1.WAV", DSBufferDesc1, Dx_Sound1 );
Dx_SoundBuffer2->CreateFromFile( "TEST2.WAV", DSBufferDesc1, Dx_Sound1 );
Dx_SoundBuffer3->CreateFromFile( "TEST3.WAV", DSBufferDesc1, Dx_Sound1 );
// play all (3) sounds immediately, starting at byte-offset 0, with no "looping"... once only
Dx_SoundBuffer1->Play(0,0);
Dx_SoundBuffer2->Play(0,0);
Dx_SoundBuffer3->Play(0,0);
}
// All done.
// Note: Destruction of objects and cleanup of resources is automatic and is taken care
// of by the TDx_Library maintaining everything to do with DirectX internally and
// working with the BCB VCL as necessary.
// At program exit, everything is perfectly neat and tidy - automagically
}
SUMMARY:
Again, that was easy wasn't it? A fully-fledged DirectSound application designed to play (3) .wav files simultaneously...
A few clicks, then (7) lines of code to perfectly and simultaneously playback (3) .wav files...
Wow!
|
TDX_LIBRARY BASICS - PART 3 -
"ADD A FEW ONXXX() EVENTS"
Top
Next
Prev

IDEA:
Suppose you want to know if everything is working or not, with message boxes popping up on the screen
in response to various events occurring, such as OnCreate(), OnDestroy() and so on.
Using the C++ Builder Object Inspector, you can setup various OnXXX() events, just by double-clicking
the relevant field of the BCB Object Inspector.
CODE EXAMPLE:
// Open C++ Builder X with the TDx_Library installed, File->"New Application",
// Select the "TDx_Sound" tab from the standard C++ Builder component palette,
// Click & Drop a TDx_Sound component, a TDx_SoundBuffer component and a TDSBufferDesc component
// onto the standard newly-generated TForm...
// then drop a standard TButton onto the form, double-click on the new TButton, and add the code
// between the brackets below... which does the following :-
void __fastcall TForm1::Button1Click(TObject *Sender)
{
// create a DirectSound interface for the default Windows sound playback device
if (Dx_Sound1->Create(NULL))
{
// create a sound buffer from a .wav file, and save the description in DSBufferDesc1
Dx_SoundBuffer1->CreateFromFile( "TEST.WAV", DSBufferDesc1, Dx_Sound1 );
// play the sound immediately, starting at byte-offset 0, with no "looping"... once only
Dx_SoundBuffer1->Play(0,0);
// wait for the sound to finish playing
while (Dx_SoundBuffer1->Playing) ; // do nothing
// manually destroy the sound buffer
Dx_SoundBuffer1->Destroy();
// manually destroy the sound interface
Dx_Sound1->Destroy();
}
// All done.
}
// This function is called TDx_Sound1::OnCreate() and is automatically created by double-clicking
// on the TDx_Sound1 component.
// It is called by the TDx_Sound::Create() method on successful creation of the DirectX interface.
void __fastcall TForm1::DxSound1Create(TObject *Sender)
{
// display a modal message box on the screen with the following message and an OK button. continue when done.
ShowMessage("Note: An interface to DirectSound has been created");
}
// This function is called TDx_Sound1::OnDestroy() and is created by double-clicking
// the OnDestroy field of the TDx_Sound1 component using the BCB Object Inspector.
// It is called by the TDx_Sound::Destroy() method just prior to destruction of the DirectX interface.
void __fastcall TForm1::DxSound1Destroy(TObject *Sender)
{
// display a modal message box on the screen with the following message and an OK button. continue when done.
ShowMessage("Note: An interface to DirectSound is being destroyed..");
}
// This function is called TDx_SoundBuffer1::OnCreate() and is automatically created by double-clicking
// on the TDx_SoundBuffer1 component.
// It is called by the TDx_SoundBuffer1::CreateFromFile() method on successful creation of the DirectX sound buffer.
void __fastcall TForm1::DxSoundBuffer1Create(TObject *Sender)
{
// display a modal message box on the screen with the following message and an OK button. continue when done.
ShowMessage("Note: The sound buffer has been created");
}
// This function is called TDx_SoundBuffer1::OnDestroy() and is created by double-clicking
// the OnDestroy field of the TDx_SoundBuffer1 component using the BCB Object Inspector.
// It is called by the TDx_SoundBuffer1::Destroy() method just prior to destruction of the DirectX sound buffer.
void __fastcall TForm1::DxSoundBuffer1Destroy(TObject *Sender)
{
// display a modal message box on the screen with the following message and an OK button. continue when done.
ShowMessage("Note: The sound buffer is being destroyed..");
}
SUMMARY:
Once Again, that was easy wasn't it? A fully-fledged DirectSound application that plays a .wav file and comes
complete with step-by-step message boxes to display information on the runtime status of the application.
So far so good.
|
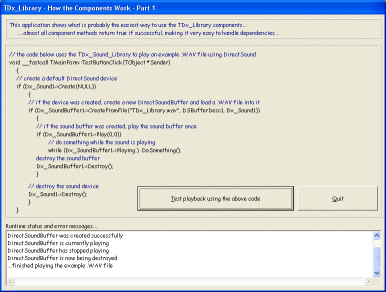
TDX_LIBRARY - EXAMPLE 1 - HOW THE COMPONENTS WORK - PART 1
"TDX_LIBRARY METHODS RETURN TRUE OR FALSE RESULTS"
Top
Next
Prev

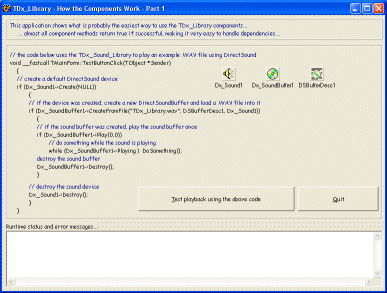
IDEA:
Many of the TDx_Library components have VCL-style methods, which are called to perform DirectX functions,
and most of the TDx_Library "interface methods" usually return a "true on success" or "false on failure" result,
which can be used to easily structure code for successful DirectX error handling.
EXAMPLE:
This example shows one way of coding an application using the boolean return results
obtained by calling the TDx_Library functions to display simple debug messages using ShowMessage().
CODE EXAMPLE:
// Open C++ Builder X with the TDx_Library installed, File->"New Application",
// Select the "TDx_Sound" tab from the standard C++ Builder component palette,
// Click & Drop a TDx_Sound component, a TDx_SoundBuffer component and a TDSBufferDesc component
// onto the standard newly-generated TForm...
// then drop a standard TButton onto the form, double-click on the new TButton, and add the code
// between the brackets below... which does the following :-
// (1) it creates an interface to the DirectSound default device, the current Windows sound playback device
// Dx_Sound1->Create(NULL);
// (2) if (1) is successful, it creates a sound buffer and loads data into it from the file TEST.WAV
// Dx_Sound1->CreateFromFile( "TEST.WAV", DSBufferDesc1, Dx_Sound1 );
// (3) if (2) is successful, it plays the sound buffer once out the current sound hardware device
// Dx_SoundBuffer1->Play(0,0);
// (4) all the time it displays appropriate confirmation / error messages
// Note: For those not familiar with Borland C++ Builder, the component creation and destruction
// is handled entirely by Borland C++ Builder, and all you have to do from a programmers perspective is
// actually >use< the components... you no longer have to worry about all the fiddly little bits...
void __fastcall TForm1::Button1Click(TObject *Sender)
{
// create a DirectSound interface for the default Windows sound playback device
if (Dx_Sound1->Create(NULL))
{
// display the following text in a message box on the screen with a single OK button
ShowMessage("DirectSound interface has been created successfully");
// create a sound buffer from a .wav file, and save the buffer description into DSBufferDesc1
if (Dx_SoundBuffer1->CreateFromFile( "TEST.WAV", DSBufferDesc1, Dx_Sound1 ))
{
// display the following text in a message box on the screen with a single OK button
ShowMessage("DirectSoundBuffer has been created successfully");
// play the sound immediately, starting at byte-offset 0, with no "looping"... once only
if (Dx_SoundBuffer1->Play(0,0))
// display the following text in a message box on the screen with a single OK button
ShowMessage("Playing Sound File: TEST.WAV");
else
// display the following text in a message box on the screen with a single OK button
ShowMessage("Error: Could not Play Sound File: TEST.WAV");
}
else
// display the following text in a message box on the screen with a single OK button
ShowMessage("Error: DirectSoundBuffer could not be created successfully");
}
else
// display the following text in a message box on the screen with a single OK button
ShowMessage("Error: DirectSound interface was not created");
// All done.
// Note: Destruction of objects and cleanup of resources is automatic and is taken care
// of by the TDx_Library maintaining everything to do with DirectX internally and
// working with the BCB VCL as necessary.
}
|
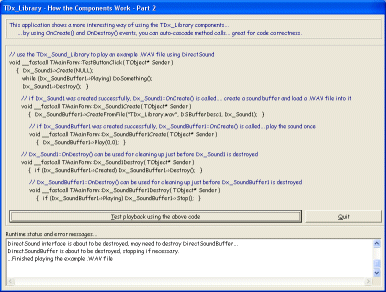
TDX_LIBRARY - EXAMPLE 2 - HOW THE COMPONENTS WORK - PART 2
"CASCADING EVENTS USING ONCREATE() AND ONDESTROY()"
Top
Next
Prev

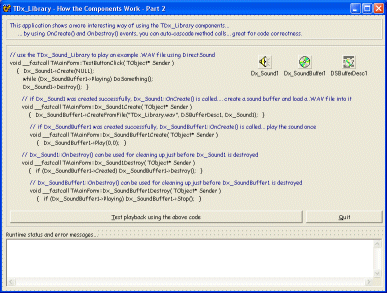
IDEA:
The TDx_Library interface components have OnCreate() and OnDestroy() events,
triggered by calls to ::Create() and ::Destroy() methods,
which you can use to easily structure code for automatic cascading of DirectX objects.
EXAMPLE:
This application shows how to cascade the creation and destruction of associated DirectX elements
using the OnCreate() and OnDestroy() events.
It creates an interface to DirectSound, then if that is successful it creates a DirectSoundBuffer
from a .wav file, and if that is successful it starts playing the .wav, waits while the .wav is playing,
then destroys the DirectSoundBuffer, and finally destroys the DirectSound interface.
The end result is that when you run the example2.exe, then click the button, a .wav sound file will play
and various messages will result.
CODE EXAMPLE:
// a standard TButton::OnClick() event
void __fastcall TForm1::Button1Click(TObject *Sender)
{
// create a DirectSound interface for the default Windows sound playback device.
// if successful, the TDx_Sound::OnCreate() event is called.
if (!Dx_Sound1->Create(NULL))
ShowMessage("DirectSound interface could not be created");
// because the TDx_Sound::OnCreate() event is used to create the soundbuffer,
// and because the TDx_SoundBuffer::OnCreate() is used to begin playback,
// the buffer has already been created from the file, and it's already playing,
// so wait for it to stop playing
while (Dx_SoundBuffer1->Playing)
; // DoSomething();
// done, finished playing test .wav file, cleanup everything by destroying the
// sound device, which will call TDx_Sound::OnDestroy() to automatically destroy
// the soundbuffer
if (Dx_Sound1->Created) Dx_Sound1->Destroy();
}
// a standard TDx_Sound::OnCreate() event, called upon successful creation
// of the TDx_Sound interface using the TDx_Sound::Create() method.
void __fastcall TForm1::Dx_Sound1Create(TObject *Sender)
{
ShowMessage("DirectSound interface has been created successfully");
// create a test soundbuffer compatible with the Dx_Sound1 device from a .wav file,
// and store the buffer description in DSBufferDesc1...
if (!Dx_SoundBuffer1->CreateFromFile( "TEST.WAV", DSBufferDesc1, Dx_Sound1 ))
ShowMessage("DirectSoundBuffer could not be created successfully");
}
// a standard TDx_Sound::OnDestroy() event, called just prior to successful destruction
// of the TDx_Sound interface using the TDx_Sound::Destroy() method.
void __fastcall TForm1::Dx_Sound1Destroy(TObject *Sender)
{
ShowMessage("DirectSound interface is being destroyed");
if (Dx_SoundBuffer1->Created)
Dx_SoundBuffer1->Destroy();
}
// a standard TDx_SoundBuffer::OnCreate() event, called upon successful creation
// of the TDx_SoundBuffer interface using (in this case) the TDx_SoundBuffer::CreateFromFile() method.
void __fastcall TForm1::Dx_SoundBuffer1Create(TObject *Sender)
{
ShowMessage("DirectSoundBuffer has been created successfully");
// make some sound effects, with playback starting at byte-offset 0 in the .wav file, and don't loop
Dx_SoundBuffer1->Play(0,0);
}
// a standard TDx_SoundBuffer::OnDestroy() event, called just prior to destruction
// of the TDx_SoundBuffer interface using the TDx_SoundBuffer::Destroy() method.
void __fastcall TForm1::Dx_SoundBuffer1Destroy(TObject *Sender)
{
ShowMessage("DirectSoundBuffer is being destroyed");
// make sure to stop the buffer playback, letting it become free ready to be destroyed.
if (Dx_SoundBuffer1->Playing)
Dx_SoundBuffer1->Stop();
}
|
TDX_LIBRARY - EXAMPLE 3 - HOW THE COMPONENTS WORK - PART 3
"USING THE ONERROR() EVENT"
Top
Next
Prev

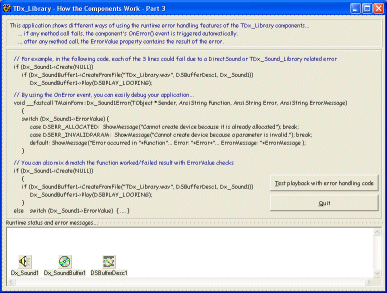
IDEA:
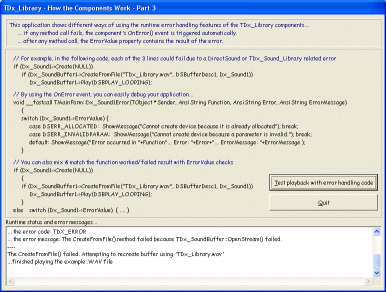
The TDx_Library interface components have automatic error detection using the various OnError() events,
which can be used to detect and identify and handle DirectX runtime errors.
EXAMPLE:
This application shows different methods of using the OnError() events, ErrorValue properties, and
boolean return values. It then shows how to interpret and respond to specific errors in the OnError() events.
For example, each of the following lines could fail and cause an error, something we have deliberately done
inside this example. The idea of this example is run the .exe, click the button, read the error messages :-
CODE EXAMPLE:
// a standard TButton::OnClick() event
void __fastcall TForm1::Button1Click(TObject *Sender)
{
// create a DirectSound interface for the default Windows sound playback device
if (!Dx_Sound1->Create(NULL))
ShowMessage("DirectSound interface could not be created");
// because the TDx_Sound::OnCreate() event is used to create the soundbuffer,
// and because the TDx_SoundBuffer::OnCreate() is used to begin playback,
// the buffer has already been created from the file, and it's already playing,
// so wait for it to stop playing
while (Dx_SoundBuffer1->Playing)
; // DoSomething();
// done, finished playing test .wav file, cleanup everything by destroying the
// sound device, which will call TDx_Sound::OnDestroy() to automatically destroy
// the soundbuffer
if (Dx_Sound1->Created) Dx_Sound1->Destroy();
}
// this is an error handler for the TDx_Sound1 device, which reports a complete
// error message to the end-user, including the function the error occurred in,
// the errorcode, the error text, and the error message. After the error has been
// displayed, the application continues.
void __fastcall TForm1::Dx_Sound1Error(TObject *Sender, AnsiString Function, AnsiString Error, AnsiString ErrorMessage )
{
AnsiString message = "An error occurred in the DirectSound interface.\n";
message = message + "Function: "+ Function +"\n";
message = message + "ErrorCode: "+ IntToStr((int)Dx_Sound1->ErrorValue) +"\n";
message = message + "Error: "+ Error +"\n";
message = message + "ErrorMessage: "+ ErrorMessage );
ShowMessage(message);
}
|
TDX_LIBRARY - EXAMPLE 4 - SETTING UP YOUR BCB APPLICATION - PART 1 - coming soon for v1.90 Registered Users only
Top
Next
Prev

IDEA:
Setting up your application is usually as simple as executing the TDx_Library_Install,
then open BCBx, go File-New-Application, navigate to the TDx_Draw, TDx_Sound, TDx_Input,
TDx_Play, TDx_3DI components, drop a TDx_Library component on a standard TForm,
press F1 to see the detailed BCB help, press F11 to see the object inspector settings
for the component, add #include "TDx_???_Library" to the main form's .cpp file, press F9.
EXAMPLE:
This application shows one method of setting up an application to use the TDx_Library so
that you can quickly and easily add DirectX support to your BCB applications.
|
TDX_LIBRARY - EXAMPLE 5 - SETTING UP YOUR BCB APPLICATION - PART 2 - coming soon for v1.90 Registered Users only
Top
Next
Prev

IDEA:
While getting DirectX and BCB to work is now easy as eating pie, it's still a matter of getting
your application to do everything simultaneously, mixing BCB and DirectX successfully.
EXAMPLE:
This application shows how to setup a TApplication and mix DirectX and the BCB with the aim
being to interface with DirectX's realtime graphics, sound, input and networking while still
utilizing the full functionality available withing the standard BCB VCL.
|
TDX_LIBRARY - EXAMPLE 6 - SETTING UP YOUR BCB APPLICATION - PART 3 - coming soon for v1.90 Registered Users only
Top
Next
Prev

IDEA:
Depending on how you use DirectX and BCB, you can make your application completely blitz it.
EXAMPLE:
This application shows how to optimize your TDx_Library application so as to make your application
(a) work perfectly with the BCB VCL (b) make DirectX function without unnecessary overhead.
|
TDX_DRAW_LIBRARY
Top
Next
Prev
Next Library
Prev Library


This section contains demos that show the features common to all the TDx_Draw_Library.
This section also contains advanced demos that highlight the more advanced capabilities of the TDx_Draw_Library.
Below are demo / tutorial applications compiled using the TDx_Draw_Library v1.70 :-
Examples for the older libraries can be found on the Downloads page.
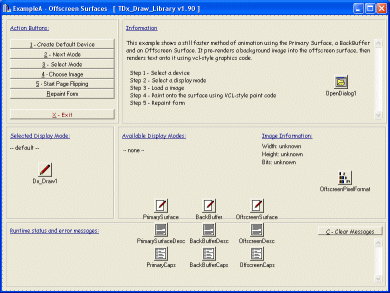
- Example A - Bit-Blitting with Offscreen Surfaces
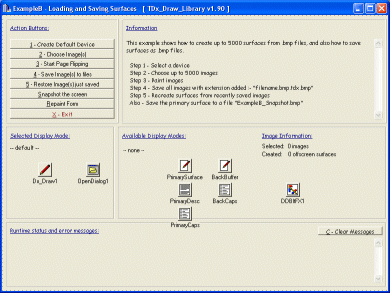
- Example B - Loading & Saving Surfaces to .bmp files
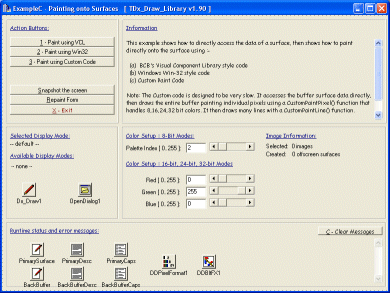
- Example C - Painting onto Surfaces directly using pixels and custom paint routines
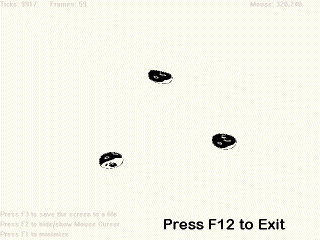
- Example Q - Converted DirectX SDK Example - Donuts
EXAMPLE 1 - "CAPABILITIES OF THE DEFAULT DEVICE"
Top
Next
Prev

IDEA:
To use DirectDraw(tm), you first need an interface to DirectDraw.
EXAMPLE:
This example shows how to create a DirectDraw interface for the 'Default DirectDraw Device',
how to retrieve the capabilites of the DirectDraw display device,
and how to destroy the DirectDraw interface when finished with.
The Default DirectDraw Device is what Windows is currently using as it's primary display device.
If you are reading this from your monitor, you are looking at the output of the Default DirectDraw Device.
|
EXAMPLE 2 - "ENUMERATING AVAILABLE DISPLAY DEVICES"
Top
Next
Prev

IDEA:
To use other DirectDraw devices, you need to scan for the devices.
EXAMPLE:
This example shows how to 'Enumerate' (scan) available display devices attached to the system.
It then shows how to create an interface for a selected display device,
how to retrieve the capabilites of the newly created device,
and how to destroy the interface for the selected device.
|
EXAMPLE 3 - "USING MULTIPLE DISPLAY DEVICES SIMULTANEOUSLY"
Top
Next
Prev

IDEA:
You can use all available DirectDraw devices simultaneously if you want.
EXAMPLE:
This example shows how to 'Enumerate' (scan) available display devices attached to the system.
It then shows how to create an interface for all available display devices,
how to retrieve the capabilites for all created devices,
and how to destroy the interface for all created devices.
It creates a new TDx_Draw component at runtime inside each TDx_Draw::OnDDEnumerate() event,
and stores the component in a global TList for later use, during the retrieve caps section.
|
EXAMPLE 4 - "SETTING COOPERATIVE LEVELS"
Top
Next
Prev

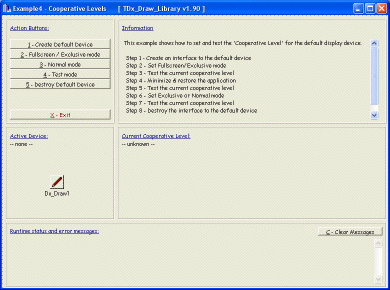
IDEA:
To control a DirectDraw device, you need to set the cooperative level.
EXAMPLE:
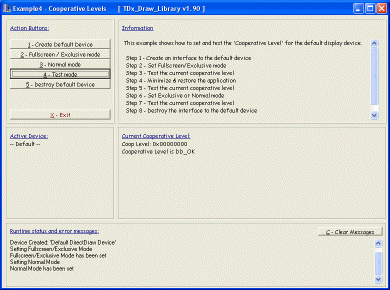
This example shows how to set and test the 'Cooperative Level' for the default display device,
which is how you control what kind of access you want to the display device.
Exclusive/Fullscreen access means only your application is using the device,
Normal means that other applications may be using the display device simultaneously and may deny access.
|
EXAMPLE 5 - "ENUMERATING AND SETTING DISPLAY MODES"
Top
Next
Prev

IDEA:
You can change the display mode (resolution) for any given display device.
EXAMPLE:
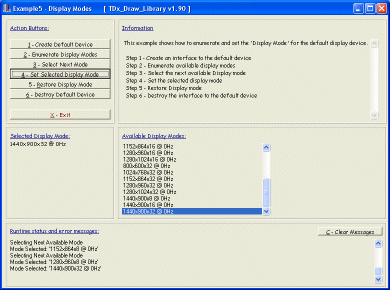
This example enumerates (scans) all currently available display modes for the default display device and sets the Display Mode for the default display device.
It shows how to :-
- Create an interface to the default device
- Enumerate available display modes
- Select an available Display mode
- Set the selected display mode
- Restore Display mode
- Destroy the interface to the default device
|
EXAMPLE 6 - "PAINTING ON THE PRIMARY SURFACE"
Top
Next
Prev

IDEA:
To paint to a device, you need to create a DirectDraw Primary Surface.
EXAMPLE:
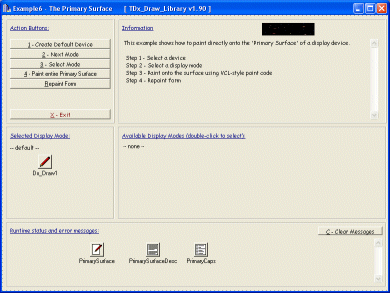
This example shows how to paint graphics directly onto the 'Primary Surface' of a particular display device using standard VCL graphics code.
The primary surface is a rectangular graphics buffer holding the contents of the graphic display currently visible on the selected device.
It shows how to :-
- Select a display device
- Select a display mode
- Paint directly onto the primary surface using standard VCL paint code
|
EXAMPLE 7 - "PAINTING ON THE BACK BUFFER"
Top
Next
Prev

IDEA:
By creating a Primary Surface with an attached BackBuffer, arranged in a flip-chain,
DirectDraw is automatically setup for page-flipping, or full-screen flicker-free graphics.
EXAMPLE:
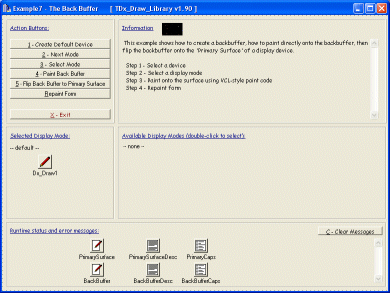
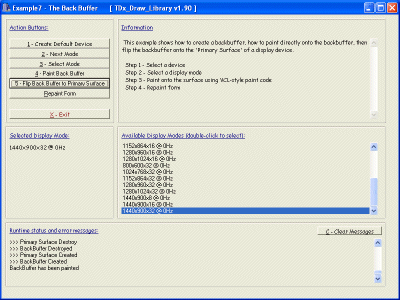
This example shows how to create a primary surface and an attached backbuffer, then shows how to "page-flip" the back buffer to the primary surface.
It shows how to :-
- Select a graphics device
- Select a display mode
- Create a Primary Surface with attached BackBuffer
- Paint directly onto the BackBuffer using VCL code
- Flip the backbuffer to the primary surface, implementing page-flipping
- Destroy the Primary Surface and BackBuffer
|
EXAMPLE 8 - "FULLSCREEN ANIMATION WITH PAGE FLIPPING"
Top
Next
Prev

IDEA:
Once you have created a Primary Surface or a BackBuffer, there are a variety of ways
you can paint directly onto the surface.
EXAMPLE:
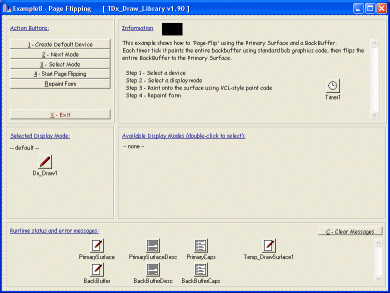
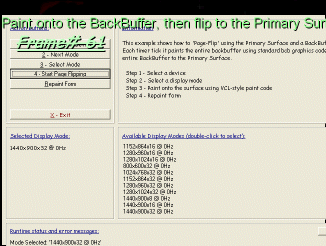
This example shows how to 'Page-Flip' using the Primary Surface and a BackBuffer.
It also shows how to paint the contents of a TForm onto the BackBuffer.
Each timer tick it paints the entire backbuffer using standard bcb graphics code, then flips the
entire BackBuffer to the Primary Surface, showing a simple page flipping animation technique.
It shows how to :-
- Select a graphics device
- Select a display mode
- Create a Primary Surface with attached BackBuffer
- Paint directly onto the BackBuffer using VCL code
- Flip the backbuffer to the primary surface, implementing page-flipping
- Destroy the Primary Surface and BackBuffer
|
EXAMPLE 9 - "FASTER PAGE FLIPPING"
Top
Next
Prev

IDEA:
Using a TTimer for animation is probably not the fastest method of animating.
A slightly better method is to use TApplication::OnIdle() for animation.
EXAMPLE:
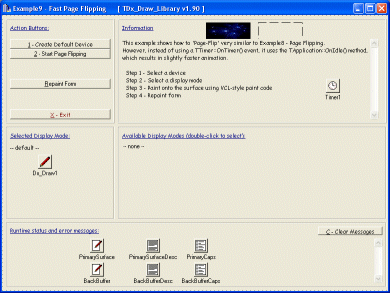
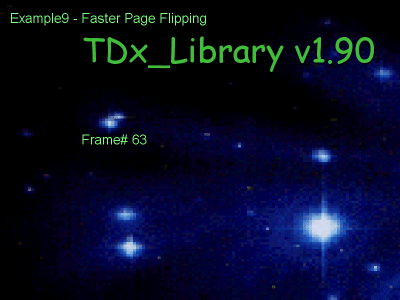
This example shows how to 'Page-Flip' using the Primary Surface and a BackBuffer.
It's like example 8 but with optimizations to make it faster.
It shows how to :-
- Create a default device
- Select a display mode
- Create a Primary Surface with attached BackBuffer
- Paint directly onto the BackBuffer using VCL code
- Flip the backbuffer to the primary surface, implementing page-flipping
- Destroy the Primary Surface and BackBuffer
|
EXAMPLE A - "BIT-BLITTING WITH OFFSCREEN SURFACES"
Top
Next
Prev

IDEA:
Using Offscreen Surfaces leads to much better animation performance.
EXAMPLE:
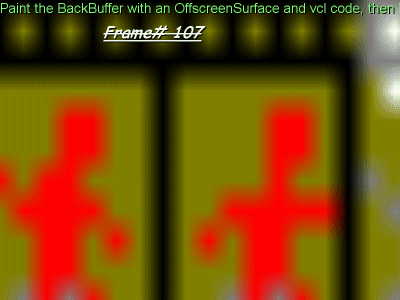
This example shows a still faster method of animation using the Primary Surface, a BackBuffer and an Offscreen Surface.
It pre-renders a background image into the offscreen surface, then renders text onto it using vcl-style graphics code.
|
EXAMPLE B - "LOADING AND SAVING SURFACES TO .BMP FILES"
Top
Next
Prev

IDEA:
The TDx_Library has additional methods built-in to help make life easier.
Using the TDx_DrawSurface::CreateFromFile() and TDx_DrawSurface::SaveToFile() methods is an example.
EXAMPLE:
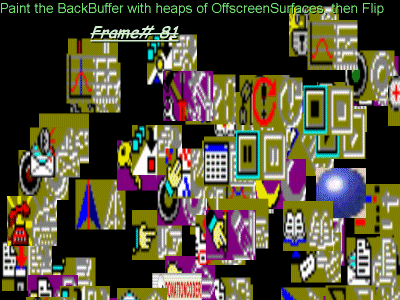
This example pre-loads up to 5000 images from .bmp files,
it then renders all images randomly during a normal animation loop (scaled to 100x100 pixels).
This demo can also save all images to disk & reload them just to make sure,
and it can save a snapshot of the current primary surface to a .bmp file.
|
EXAMPLE C - "PAINTING ONTO SURFACES DIRECTLY USING PIXELS AND CUSTOM PAINT ROUTINES"
Top
Next
Prev

IDEA:
You can directly access the raw data of a DirectDrawSurface, and can then
manipulate a surface using custom paint or special effects routines if required.
EXAMPLE:
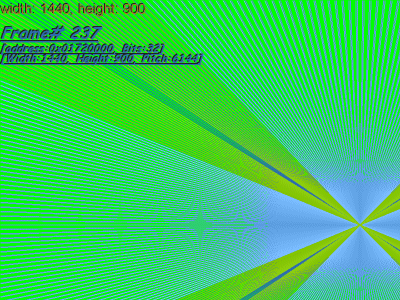
This example shows how to directly access the data of a surface, then shows how to paint
directly onto the surface using :-
(a) BCB's Visual Component Library style code
(b) Windows Win-32 style code
(c) Custom Paint Code
Notes:
The Custom code is designed to be very slow. It accesses the buffer surface data directly,
then draws the entire buffer painting individual pixels using a CustomPaintPixel() function that
handles 8,16,24,32 bit colors. It then draws many lines with a CustomPaintLine() function.
|
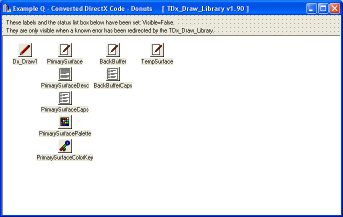
EXAMPLE Q - "CONVERTED DIRECTX SDK EXAMPLE - DONUTS"
Top
Next
Prev

IDEA:
Converting from standard DirectX code is a little tricky, but quite possible.
Converting generally requires a 1:1 translation, with regular removal of redundant code.
EXAMPLE:
The is the best conversion example that sofar works.
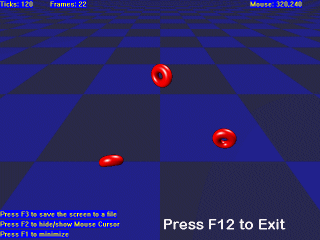
It is a conversion of the DirectX SDK's Example4 demo, the one containing page-flipping donuts.
It works well, is faster in lower resolutions, slower in higher resolutions, and it uses the
TDx_DrawSurface::SaveToFile() method to save a screenshot (F3).
|
TDX_SOUND_LIBRARY
Top
Next
Prev
Next Library
Prev Library


This section contains demos that show the features common to all the TDx_Sound_Library.
This section also contains advanced demos that highlight the more advanced capabilities of the TDx_Sound_Library.
Below are demo / tutorial applications compiled using the TDx_Sound_Library v1.70 :-
Examples for the older libraries can be found on the Downloads page.
EXAMPLE 1 - "ENUMERATING SOUND PLAYBACK DEVICES"
Top
Next
Prev

IDEA:
To begin using DirectSound(tm), you usually need to know what sound devices
are currently attached to the system, and you then usually need to know what
capabilities that particular device has.
EXAMPLE:
This example shows how to 'Enumerate DirectSound Devices',
a bit like scanning Windows for all sound devices that
are currently attached to the system and functioning correctly.
After all devices have been enumerated, an interface to a given
device can be created, the device capabilities can be retrieved,
and the device is ready for sound playback.
|
EXAMPLE 2 - “PLAYING AROUND WITH SOUNDS"
Top
Next
Prev

IDEA:
Once you have created a DirectSoundBuffer, you can modify playback in realtime, with amusing results.
EXAMPLE:
This example shows how to manipulate sounds while they are playing, including adjusting the volume, pan and frequency.
|
EXAMPLE 3 - “PLAYING MULTIPLE SOUNDS”
Top
Next
Prev

IDEA:
DirectSound will automatically mix any number of sounds you attempt to play out of a
the primary DirectSoundBuffer.
EXAMPLE:
This example shows how to play multiple sound effects simultaneously
simply by dropping different components onto a TForm.
|
EXAMPLE 4 - “PLAYING UNLIMITED SOUNDS”
Top
Next
Prev

IDEA:
You can create the TDx_Sound_Library components on-the-fly instead of
dropping them onto you form at design-time, which lets you have an almost
unlimited supply of sounds at your disposal.
EXAMPLE:
This example shows how to use a TList to create components on-the-fly,
which allows an unlimited number of sounds to be played simultaneously.
Warning: Do not select too many files. It is very possible to
seriously crash your pc if you choose to play a Gig or two of
sounds simultaneously.
|
EXAMPLE 5 - “SOUNDBUFFER NOTIFICATIONS”
Top
Next
Prev

IDEA:
During Sound Playback, DirectSound continually updates a playback cursor to
note the byte currently being played back.
You can use the TDx_Sound_Library to automatically trigger an OnNotify() event
when the playback cursor reaches a specified offset into the DirectSoundBuffer data.
EXAMPLE:
This example shows how to use buffer Notification Positions,
which are triggers set at user defined byte offsets inside the buffer data area.
When playing back sounds, when the play cursor reaches a notification position,
it triggers the TDx_SoundBuffer::OnNotify() event.
|
EXAMPLE 7 - “STREAMING SOUNDS OR MUSIC”
Top
Next
Prev

IDEA:
Often, the sound data to be played is too large to fit in a DirectSoundBuffer, such as when
playing streaming background music.
If this is the case, such as when playing continuous background music, you might need "streaming".
EXAMPLE:
This example shows how to "stream" a sound file through a buffer
much smaller than the sound data.
|
EXAMPLE A - “CAPTURING SOUNDS”
Top
Next
Prev

IDEA:
You can use the DirectSoundCapture parts of the TDx_Sound_Library to record sounds and music.
EXAMPLE:
This example shows how to record sounds, how to setup the Primary Sound Playback Buffer
to be the same output format as the recording, and how to copy the data from the recording buffer
to the sound output buffer.
|
EXAMPLE B - “CAPTURING STREAMS”
Top
Next
Prev

IDEA:
You can use the DirectSoundCapture parts of the TDx_Sound_Library to record continuously
to disk using the TDx_SoundCaptureBuffer streaming functions.
EXAMPLE:
This example shows how to record streams, how to setup the Primary Sound Playback Buffer
to be the same output format as the recording, and how to copy the data from the recording buffer
to the sound output buffer.
|
TDX_INPUT_LIBRARY
Top
Next
Prev
Next Library
Prev Library


This section contains demos that show the features common to all the TDx_Input_Library.
This section also contains advanced demos that highlight the more advanced capabilities of the TDx_Input_Library.
Below are demo / tutorial applications compiled using the TDx_Input_Library v1.70 :-
Examples for the older libraries can be found on the Downloads page.
EXAMPLE 1 - “ENUMERATING DIRECTINPUT DEVICES”
Top
Next
Prev

IDEA:
To use DirectInput(tm), you need to create a DirectInput interface.
EXAMPLE:
This example shows how to 'Enumerate DirectInput Devices', a bit like scanning Windows for all Input devices that are currently attached to the system and functioning correctly.
After all devices have been enumerated, an interface to a given device can be created, the device capabilities can be retrieved, and the device is ready for Input playback.
|
EXAMPLE 2 - “DIRECTLY ACCESSING THE KEYBOARD”
Top
Next
Prev

IDEA:
Once you have determined the devices connected to the computer, you have gain exclusive access.
EXAMPLE:
This example shows how to access realtime keyboard data using three (3) methods :-
(1) Polled Mode
(2) Event-Driven Mode
(3) Event-Driven Mode with Forced Polling when required.
|
EXAMPLE 3 - “DIRECTLY ACCESSING THE MOUSE”
Top
Next
Prev

IDEA:
Controlling the Mouse is almost identical to using the keyboard.
EXAMPLE:
This example shows how to access realtime mouse data using three (3) methods :-
(1) Polled Mode
(2) Event-Driven Mode
(3) Event-Driven Mode with Forced Polling when required.
This example is incredibly similar to the Keyboard Demo. A bit of Search & Replace mostly.
|
EXAMPLE 4 - “DIRECTLY ACCESSING THE JOYSTICK”
Top
Next
Prev

IDEA:
Using a joystick is similar to both the mouse and the keyboard.
EXAMPLE:
This example shows how to access realtime joystick data using three (3) methods :-
(1) Polled Mode
(2) Event-Driven Mode
(3) Event-Driven Mode with Forced Polling when required.
This example is incredibly similar to the Keyboard and Mouse Demos. A bit of Search & Replace mostly.
|
EXAMPLE 5 - “FORCE FEEDBACK JOYSTICKS”
Top
Next
Prev

IDEA:
The TDx_Input_Library lets you take total control over Force Feedback joysticks,
such as the Microsoft SideWinder Force Feedback Pro.
EXAMPLE:
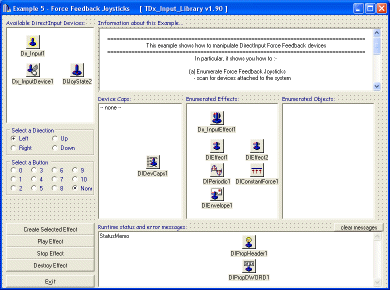
This example shows how to talk to and manipulate Force Feedback joysticks, etc.
It helps if you first look at the previous TDx_Input_Library demos, mostly so that you can
learn how to setup devices, then look at this example to see how to use force feedback effects.
This application is still under construction, but should show you where to start at least.
|
EXAMPLE 6 - “FORCE FEEDBACK EFFECTS”
Top
Next
Prev

IDEA:
You can setup and playback various force-feedback effects on devices so capable.
EXAMPLE:
This example shows how to utilize force feedback effects, including loading and saving effects.
Many thanks to Kerrigan Burgess for creating this demo.
|
TDX_PLAY_LIBRARY
Top
Next
Prev
Next Library
Prev Library


This section contains demos that show the features common to all the TDx_Play_Library.
This section also contains advanced demos that highlight the more advanced capabilities of the TDx_Play_Library.
Below are demo / tutorial applications compiled using the TDx_Play_Library v1.70 :-
Examples for the older libraries can be found on the Downloads page.
EXAMPLE 1 - “CREATING AND DESTROYING THE DIRECTPLAY INTERFACE”
Top
Next
Prev

IDEA:
To use DirectPlay, you need to use a DirectPlay interface...
EXAMPLE:
This example shows how to create a DirectPlay interface, destroy a DirectPlay interface and setup automatic error handling.
|
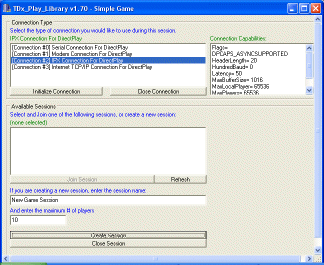
EXAMPLE 2 - “SETTING UP CONNECTIONS”
Top
Next
Prev

IDEA:
Once you have created a DirectPlay interface, you need to setup a DirectPlay connection.
Connections can be made via IPX, TCP/IP, Modem, Serial-Cable.
EXAMPLE:
This example shows how to enumerate DirectPlay connections are available using a created DirectPlay interface.
It also shows how to create a DirectPlay connection and destroy a DirectPlay connection.
|
EXAMPLE 3 - “SETTING UP SESSIONS”
Top
Next
Prev

IDEA:
Once you have created a DirectPlay connection, you need to create a new DirectPlay session, or join an existing DirectPlay session.
Sessions can have many players connecting from wherever they can connect from, arranged solo, in groups, in groups in groups, etc.
EXAMPLE:
This example shows how to enumerate DirectPlay sessions running on a particular connection, how to create a DirectPlay session and how to join a DirectPlay session.
|
TDX_PLAY_LIBRARY - “A VERY SIMPLE MULTIPLAYER TEST GAME”
Top
Next
Prev

IDEA:
This is an example TDx_Play_Library application and accompanying source code.
While not finished, it shows how to use much of the TDx_Play_Library, including
sending various types of messages between applications (players).
EXAMPLE:
As far as the players and groups go, there's a whole bunch of code we have been experimenting with,
but really the application only handles a single player per pc, which is auto-created.
When you get to the Player Setup screen, just click "Start Game" usually.
|
TDX_3DI_LIBRARY & TDX_DRAW3D_LIBRARY
Top
Next
Prev
Prev Library


This section contains demos that show the features common to all the TDx_3DI_Library.
This section also contains advanced demos that highlight the more advanced capabilities of the TDx_3DI_Library.
Below are demo / tutorial applications compiled using the TDx_3DI_Library v1.70 :-
Examples for the older libraries can be found on the Downloads page.
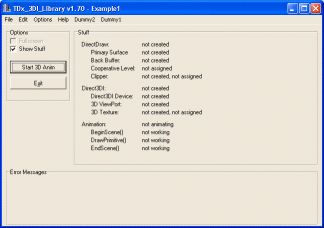
EXAMPLE 1 - “BACKGROUND TEXTURE MAP SCROLLER”
Top
Next
Prev

IDEA:
To use Direct3DI, you need to use a Direct3DI interface...
EXAMPLE:
This example shows how to create a Direct3DI interface, destroy a Direct3DI interface and setup automatic error handling.
|
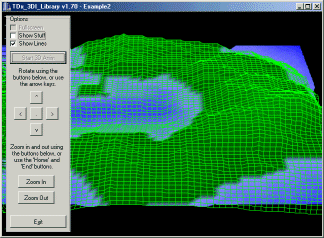
EXAMPLE 2 - “3D LANDSCAPE GENERATION”
Top
Prev
Prev Library

IDEA:
It would be nice to be able to show some 3d maps being generated...
EXAMPLE:
This is a translation of some standard DirectX 7.0a SDK source code i found on the internet.
|
|
|


